
The Lemoyne Star Quilt – Tutorial is a must-read for quilting enthusiasts who want to create this stunning and timeless pattern. The Lemoyne Star Quilt has been a favorite among quilters for centuries due to its elegant geometric design and intricate star pattern.
This tutorial will guide you step by step, ensuring that you can craft your very own Lemoyne Star Quilt with precision and ease.
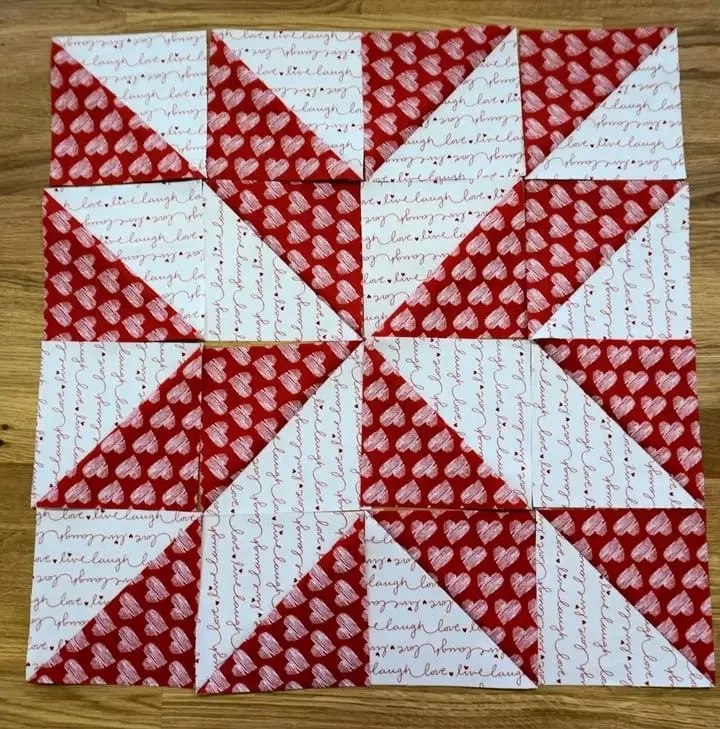
This pattern is known for its unique eight-pointed star, which may seem challenging at first, but with the right technique, it becomes a fun and rewarding quilting project.
Whether you’re a beginner or an experienced quilter, following a structured approach will help you achieve perfect points and a seamless design.
In this tutorial, we will cover everything from selecting fabrics to sewing techniques, ensuring that your final quilt looks professional and visually stunning. Follow along as we explore the process, tips, and tricks to master the Lemoyne Star Quilt effortlessly.
1. Choosing the Right Fabric and Tools
Selecting the perfect fabric is the foundation of a stunning Lemoyne Star Quilt. The right combination of colors and textures will enhance the star pattern and make it stand out beautifully.
When choosing fabric, opt for high-quality cotton that holds its shape well. Pre-washing your fabric is essential to prevent shrinkage after quilting. Consider using contrasting colors to make the star pop against the background.
Cutting tools are just as important as fabric selection. A sharp rotary cutter, a cutting mat, and a ruler will help ensure precision in cutting the quilt pieces. Precision is key to achieving perfect star points.
Choosing the right thread is also crucial. A strong, fine thread will help keep the seams secure while reducing bulk in the finished quilt. Neutral colors work best to blend seamlessly with different fabrics.
Marking tools such as fabric chalk or erasable pens will assist in accurate cutting and piecing. These tools make it easier to align fabric sections correctly before sewing.
Lastly, ensure you have a quality sewing machine with a quarter-inch foot. This foot helps maintain consistent seam allowances, which is essential for the intricate design of the Lemoyne Star Quilt.
2. Cutting and Preparing the Fabric Pieces
Precision cutting is essential when making a Lemoyne Star Quilt. Accurate pieces will make the assembly process smoother and ensure the final quilt looks polished.
Begin by cutting squares and strips according to the required measurements. Using a rotary cutter and ruler will help maintain uniformity in size.
One of the key techniques for this pattern is cutting fabric pieces on the bias. This method helps prevent distortion and ensures the pieces fit together seamlessly.
To achieve the classic star shape, you will need to cut diamond-shaped pieces. Templates or specialty rulers can make this step easier and more precise.
Pay attention to grain direction when cutting. Proper alignment prevents stretching and ensures stability in the final quilt top.
Before sewing, arrange the fabric pieces on a flat surface to visualize the final design. This step helps in making any necessary color adjustments before assembly.
Labeling the fabric pieces can also be helpful, especially for beginners. Mark each piece according to its placement to avoid confusion during sewing.
3. Sewing and Assembling the Lemoyne Star
Now comes the most exciting part of the Lemoyne Star Quilt – Tutorial: assembling the star. This step requires patience and precision to ensure crisp points and aligned seams.
Start by sewing the diamond pieces together in pairs. Use a quarter-inch seam allowance to maintain accuracy in the design.
Press the seams carefully after each step. Always press towards the darker fabric to prevent shadowing on the lighter sections of the quilt.
Once the diamond pairs are ready, join them to form larger star units. Be mindful of seam alignment to achieve clean, sharp star points.
Piecing the star center is crucial. If necessary, use pins or fabric glue to hold sections in place before sewing to prevent shifting.
After assembling the star, add the background fabric to frame the design. This step helps in defining the star and giving the quilt a professional finish.
Check for any misalignments before proceeding to the next steps. If needed, trim and adjust the fabric pieces slightly to maintain symmetry.
4. Quilting and Finishing Touches
Once the star blocks are assembled, it’s time to quilt and finish the project. The final steps will ensure a polished and long-lasting Lemoyne Star Quilt.
Choose a quilting pattern that complements the star design. Straight-line quilting works well for a modern look, while free-motion quilting can add a decorative touch.
Use a high-quality batting material to provide warmth and structure to the quilt. Consider lightweight batting for a softer drape or thicker batting for a cozier feel.
Layering the quilt sandwich (top, batting, and backing) is an important step. Smooth out any wrinkles before basting to ensure even quilting.
When binding the edges, choose a fabric that complements the star pattern. A double-fold binding method provides durability and a neat finish.
Hand-stitching or machine-stitching the binding can be used, depending on your preference. Either method will secure the edges and give the quilt a refined appearance.
Finally, give the quilt a gentle press and enjoy your beautiful Lemoyne Star Quilt! Display it proudly or gift it to someone special.
FAQ
Q: Is the Lemoyne Star Quilt suitable for beginners?
A: Yes, but it requires patience and precision. Beginners should practice basic quilting techniques before attempting this pattern.
Q: What size should my fabric pieces be for the Lemoyne Star?
A: The size varies based on your project, but typically, diamond shapes measure around 3-4 inches per side.
Q: Can I make a Lemoyne Star Quilt without special rulers?
A: Yes, but using a specialty ruler makes cutting and piecing easier and more precise.
Q: How do I prevent stretching when working with bias-cut fabric?
A: Handle fabric gently, use starch for added stability, and avoid pulling on the pieces while sewing.
Q: What is the best way to quilt a Lemoyne Star design?
A: Straight-line quilting enhances the geometric pattern, while free-motion quilting adds texture and creativity.
Join our VIP broadcast list and gain access to exclusive patterns, all for free. As a VIP member, you’ll receive the best patterns daily, delivered directly to your device. ✨📱 It’s a unique opportunity to stay up-to-date with the latest trends and designs, curated just for you. Don’t miss out on enhancing your projects and discovering new inspirations with the best patterns every day! 🎨🔝
Conclusion
Creating a Lemoyne Star Quilt is a rewarding and enjoyable experience. This tutorial has provided a step-by-step guide, from selecting fabrics to final quilting touches, ensuring that you can confidently complete this timeless design.
Quilting is an art form that brings warmth and beauty to any space. Whether you’re making a quilt for yourself or as a gift, the Lemoyne Star Quilt is a fantastic project to master. If you enjoyed this tutorial, leave a comment with your thoughts and any suggestions for future quilting tutorials!