
How to make a mouth-shaped toiletry bag. pattern is a creative and fun project that combines functionality with a bold, eye-catching design. If you love handmade crafts and want to create something unique, this guide will walk you through every step while helping you understand the key techniques involved. Whether you are a beginner or an experienced crafter, mastering this project can open doors to many other creative sewing possibilities.
Creating a mouth-shaped toiletry bag pattern is not only about stitching fabric together—it’s about bringing personality into your handmade items. This project allows you to experiment with shapes, textures, and colors, resulting in a piece that stands out from traditional toiletry bags. With the right approach and materials, you can transform a simple idea into a stylish and practical accessory.
In this article, we will explore everything you need to know about how to make a mouth-shaped toiletry bag pattern, including materials, techniques, customization ideas, and common mistakes to avoid. By the end, you will feel confident enough to create your own version and even adapt the design for other creative projects.
Materials and Tools for a Mouth-Shaped Toiletry Bag Pattern
To start your journey in how to make a mouth-shaped toiletry bag pattern, gathering the right materials is essential. The quality of your tools and fabrics directly affects the final result. Choosing durable and easy-to-work materials will make the process smoother and more enjoyable.
First, you will need fabric for both the outer layer and the lining. Cotton fabric is a popular choice because it is easy to sew and comes in various prints. For a more luxurious look, you might consider velvet or faux leather. Make sure the fabric is strong enough to hold the bag’s shape.
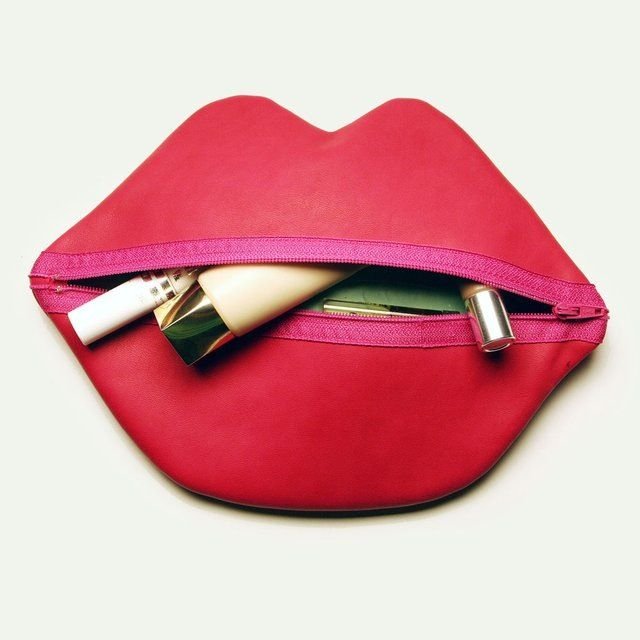
Next, a zipper is a key component in any mouth-shaped toiletry bag pattern. Since the design resembles lips, the zipper often acts as the “mouth opening.” Choose a zipper that complements your fabric color and is long enough to span the width of your design.
You will also need interfacing to give structure to your bag. This helps maintain the shape and ensures durability. Fusible interfacing is commonly used because it is easy to apply with an iron.
Basic sewing tools are equally important. These include scissors, pins, measuring tape, fabric chalk, and a sewing machine. While you can sew by hand, a machine will save time and provide stronger stitches.
Finally, optional decorative elements like embroidery thread, appliqué pieces, or even beads can enhance your design. These details allow you to personalize your mouth-shaped toiletry bag pattern and make it truly unique.
Step-by-Step Guide on How to Make a Mouth-Shaped Toiletry Bag Pattern
Understanding the process of how to make a mouth-shaped toiletry bag pattern step by step will help you avoid confusion and mistakes. Breaking the project into manageable steps ensures a more enjoyable crafting experience.
Start by drawing your pattern on paper. The shape should resemble lips, with a curved top and bottom. Once satisfied, cut out the pattern and use it to trace onto your fabric. Remember to add seam allowances around the edges.
Cut two pieces of outer fabric and two pieces of lining fabric. You should also cut interfacing pieces and attach them to the wrong side of the outer fabric. This will provide the necessary structure for your toiletry bag.
Next, attach the zipper to the top edge of one outer fabric piece and one lining piece. Repeat this step for the other side. Ensure that the zipper is aligned properly to maintain symmetry in your mouth-shaped toiletry bag pattern.
Once the zipper is in place, sew the outer fabric pieces together and then the lining pieces. Leave a small opening in the lining so you can turn the bag inside out later.
After sewing, carefully turn the bag right side out through the opening. Push out the corners gently to achieve a clean shape. Then, sew the opening in the lining closed.
Finally, press the bag with an iron to give it a polished look. Your mouth-shaped toiletry bag pattern is now complete and ready to use.
Creative Design Ideas and Customization Tips
One of the most exciting parts of learning how to make a mouth-shaped toiletry bag pattern is customizing your design. This allows you to express your creativity and make each piece unique.
You can experiment with different color combinations to mimic natural lips or create bold, artistic versions. Red and pink tones are classic choices, but vibrant or even metallic fabrics can add a modern twist.
Adding texture is another great way to enhance your mouth-shaped toiletry bag pattern. Consider using quilted fabric, faux leather, or even sequins for a more striking appearance. These materials can elevate your project from simple to stunning.
Embroidery can be used to add details like lip lines or highlights. This technique gives your bag a more realistic or stylized look, depending on your preference.
You might also consider adding a wrist strap or handle for convenience. This makes your toiletry bag easier to carry and adds functionality to your design.
Personalization is another key aspect. Adding initials, names, or small decorative patches can make your bag a perfect gift or a special personal item.
Finally, think about scaling your pattern. You can create smaller versions for makeup or larger ones for travel essentials. The flexibility of the mouth-shaped toiletry bag pattern makes it suitable for various uses.
Common Mistakes to Avoid When Making a Mouth-Shaped Toiletry Bag Pattern
Even with a clear guide on how to make a mouth-shaped toiletry bag pattern, beginners can encounter challenges. Being aware of common mistakes can help you avoid frustration and improve your results.
One common mistake is not adding enough seam allowance. This can lead to a bag that is smaller than intended or difficult to assemble. Always double-check your measurements before cutting.
Another issue is misaligning the zipper. Since the zipper is a central feature of the design, any misalignment can affect the overall look. Take your time to pin and sew carefully.
Using the wrong type of fabric can also cause problems. Fabrics that are too thin may not hold the shape, while overly thick fabrics can be difficult to sew. Choose materials that balance flexibility and structure.
Skipping interfacing is another frequent mistake. Without it, your mouth-shaped toiletry bag pattern may look limp and lose its intended shape. Interfacing provides the necessary support.
Rushing through the sewing process can lead to uneven stitches or crooked seams. Patience is key when working on detailed projects like this.
Lastly, not testing your pattern on scrap fabric can result in wasted materials. It’s always a good idea to do a trial run before using your final fabric.
FAQ About How to Make a Mouth-Shaped Toiletry Bag Pattern
One common question is whether beginners can successfully complete a mouth-shaped toiletry bag pattern. The answer is yes, especially if you follow step-by-step instructions and start with simple materials.
Many people also ask what type of zipper works best. A standard nylon zipper is usually recommended because it is flexible and easy to sew.
Another frequent question is how long the project takes. Depending on your skill level, it can take anywhere from one to three hours to complete.
Some wonder if the pattern can be made without a sewing machine. While it is possible, using a machine will produce more durable and professional results.
People often ask how to clean the finished bag. Most fabric toiletry bags can be hand-washed or gently machine-washed, depending on the materials used.
Finally, many are curious about selling their handmade bags. As long as you create your own version of the mouth-shaped toiletry bag pattern, you can sell your products and even build a small business around them.
VIDEO TUTORIAL
Learning how to make a mouth-shaped toiletry bag pattern is a rewarding experience that combines creativity, practicality, and skill development. Throughout this article, we explored the essential materials, step-by-step instructions, customization ideas, and common mistakes to avoid. By applying these techniques, you can create a unique and functional accessory that reflects your personal style.
Now it’s your turn to put these ideas into practice and experiment with your own designs. Try different fabrics, colors, and details to make your project truly one of a kind. If you found this guide helpful, feel free to share your honest opinion and leave suggestions—your feedback can inspire even more creative ideas!