
A Chevron Quilt Tutorial is a wonderful way to dive into the world of quilting, whether you’re a beginner or an experienced quilter looking to try a classic zigzag design. This pattern is known for its clean lines, striking visual movement, and endless possibilities when it comes to color combinations. In this article, we’ll walk you through a complete Chevron Quilt Tutorial, including fabric selection, cutting instructions, layout, and step-by-step sewing directions.
One of the most appealing aspects of the Chevron Quilt Tutorial is how easily it transforms simple half-square triangles into a sophisticated and modern quilt design. It’s a flexible pattern that works beautifully with solids, prints, or even scrap fabrics. Whether you’re creating a baby quilt, throw blanket, or full-size bed quilt, the Chevron design scales easily to meet your needs.
In this full-length guide, you’ll find detailed instructions for each step of the process. We’ve broken it down into manageable parts so you can follow along at your own pace. With our Chevron Quilt Tutorial, you’ll feel confident in creating a quilt that’s both beautiful and timeless.
Choosing Your Fabrics and Tools
Before diving into your Chevron Quilt Tutorial, you need to start with fabric selection. For a clean Chevron effect, choose two high-contrast fabrics—one light and one dark—or go bold with vibrant colors. Solids or small-scale prints work best to show off the zigzag pattern.
For a baby-size quilt (36″ x 48″), you will need:
-
1 yard of Fabric A (light or background color)
-
1 yard of Fabric B (contrast color)
-
1/2 yard for binding
-
1 1/2 yards for backing
-
Batting to match your finished size
You’ll also need basic quilting tools: a rotary cutter, cutting mat, quilting ruler, pins, sewing machine, and iron. A 1/4″ presser foot is helpful for consistent seam allowances throughout the quilt.
Cutting your fabric is the first big step. From each of your two fabrics (A and B), cut 40 squares measuring 5 inches by 5 inches. You’ll end up with a total of 80 squares. These will be paired together to create half-square triangles (HSTs), which are the building blocks of the Chevron pattern.
To make each HST, pair one Fabric A square with one Fabric B square, right sides together. Draw a diagonal line on the back of the lighter square. Sew 1/4″ on both sides of the line, then cut along the drawn line. Press open, and you’ll have two half-square triangles. Repeat this until you have 80 HSTs total.
Trim each HST to 4.5 inches square to ensure consistency and a neat finish. This trimming step is essential to help the final quilt lie flat and keep your Chevron rows sharp and clean. Now that your pieces are prepped, you’re ready to lay out your Chevron rows.
Designing the Chevron Layout
The magic of the Chevron Quilt Tutorial happens when you start arranging your half-square triangles in zigzag rows. Lay them out on a design wall, the floor, or a large table. Arrange your HSTs so the diagonal seams form “V” shapes, alternating directions in each row.
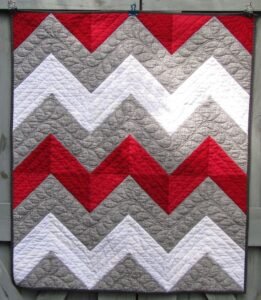
A standard Chevron layout uses rows of 8 HSTs across and 10 HSTs down, for a total of 80 blocks. Begin with the first row slanting in one direction, and in the next row, rotate the HSTs so the slant flips. Continue alternating rows until the full layout takes shape. This will create the bold Chevron “waves” across the quilt top.
Take a photo or label each row if you’re moving the layout to your sewing table. This will help you keep track of the order and direction of your HSTs. The Chevron Quilt Tutorial emphasizes planning as the key to success in achieving that sharp, clean zigzag.
Once you’re happy with your layout, begin sewing the HSTs together into rows. Use a consistent 1/4-inch seam allowance and press the seams of each row in alternating directions to help with nesting seams during row assembly.
Next, sew the rows together, matching points where the triangles meet. Pin carefully to avoid shifting. This step might take a bit of patience, but the crisp Chevron effect is worth the attention to detail.
When your quilt top is assembled, give it a final press. You’ll start to see the stunning results of your work. The strong visual appeal of this quilt pattern makes it a standout piece, and the Chevron Quilt Tutorial guides you clearly through achieving that polished look.
Assembling the Quilt Sandwich
Now that your quilt top is complete, the next stage in the Chevron Quilt Tutorial is basting your quilt sandwich. This step includes your quilt top, batting, and backing. Ensure all layers are smooth and flat before pinning or spraying to secure them together.
Start by pressing the quilt top and backing fabric thoroughly. Lay the backing fabric right-side down, followed by the batting, then center the quilt top right-side up. Make sure all layers are larger than the quilt top by at least 2 inches on each side.
Use safety pins, basting spray, or thread basting to secure the layers. Begin in the center and work outward to avoid bunching. The Chevron Quilt Tutorial recommends basting every 4-6 inches to keep all layers stable during quilting.
Now it’s time to quilt. You can opt for straight-line quilting following the Chevron pattern, which enhances the zigzag effect. Stitch in the ditch along the seams or echo the V-shape with parallel lines. This style keeps the quilting simple and lets the design shine.
If you prefer a modern finish, try quilting diagonal lines that follow the angles of the Chevron stripes. This helps emphasize the graphic nature of the quilt. Always test your quilting plan on a scrap sandwich first.
Once the quilting is finished, trim the excess batting and backing, squaring up your quilt. Your Chevron masterpiece is nearly done—just one more step to complete this Chevron Quilt Tutorial.
Binding and Finishing Your Chevron Quilt
Binding is the final step in the Chevron Quilt Tutorial, and it brings the whole quilt together beautifully. Cut your binding strips 2.5 inches wide by the width of the fabric. You’ll need about 160 inches of binding for a baby-size quilt.
Join the binding strips with diagonal seams and press them open. Fold the binding in half lengthwise, wrong sides together, and press. Attach the binding to the front of the quilt using a 1/4-inch seam allowance, starting along one edge and leaving a tail for joining.
Miter the corners by stopping 1/4 inch from each corner, turning the binding, and continuing down the next side. This gives your quilt a polished, professional look. Once the binding is sewn all around the top, fold it over to the back and hand-stitch or machine-stitch it in place.
Give the entire quilt a final press. This not only smooths out the fabric but also helps set the stitches. Your Chevron quilt is now complete, soft, and ready to be used or gifted.
The Chevron Quilt Tutorial offers a rewarding project that blends simplicity and style. Whether you use bold solids, colorful prints, or even upcycled fabrics, this design brings modern flair to any setting.
Enjoy your finished quilt and take pride in the craftsmanship it represents. Don’t forget to label it with your name and the date—it’s a handmade work of art!
FAQ – Chevron Quilt Tutorial
Q: What is the easiest way to make a Chevron quilt?
A: Follow a Chevron Quilt Tutorial that uses half-square triangles. This method keeps the process simple and manageable for all skill levels.
Q: How many fabrics do I need for a Chevron quilt?
A: You typically need two fabrics—one for the background and one for the Chevron design. Choose contrasting tones to make the zigzag pattern stand out.
Q: What size squares should I cut for a baby Chevron quilt?
A: Start with 5″ squares and trim finished half-square triangles to 4.5″. This size balances detail and speed for small quilts.
Q: Can I use precut fabric like charm packs?
A: Yes! Charm packs (5″ squares) are perfect for this pattern. Just make sure to trim your HSTs after sewing to keep them even.
Q: What’s the best quilting design for a Chevron quilt?
A: Straight-line or echo quilting along the Chevron points enhances the pattern and maintains a clean, modern look.
Q: Can I scale this Chevron Quilt Tutorial for larger quilts?
A: Absolutely. Increase the number of HSTs and rows based on your desired quilt size. The pattern easily adapts to any dimension.
The Chevron Quilt Tutorial is a versatile and fun project for quilters of all levels. It transforms basic half-square triangles into a bold and stylish design that works in any color scheme. From selecting fabrics and cutting to layout and finishing touches, each step brings your vision to life.
By following this Chevron Quilt Tutorial, you’ll create a quilt that’s both eye-catching and meaningful. The sharp zigzag pattern adds visual interest while remaining easy to sew and customize. Whether for a gift, a home décor accent, or personal use, a Chevron quilt never goes out of style.
We hope this guide has inspired you to start your own Chevron quilt project. Have questions or want to share your progress? Leave a comment—we’d love to hear from you!