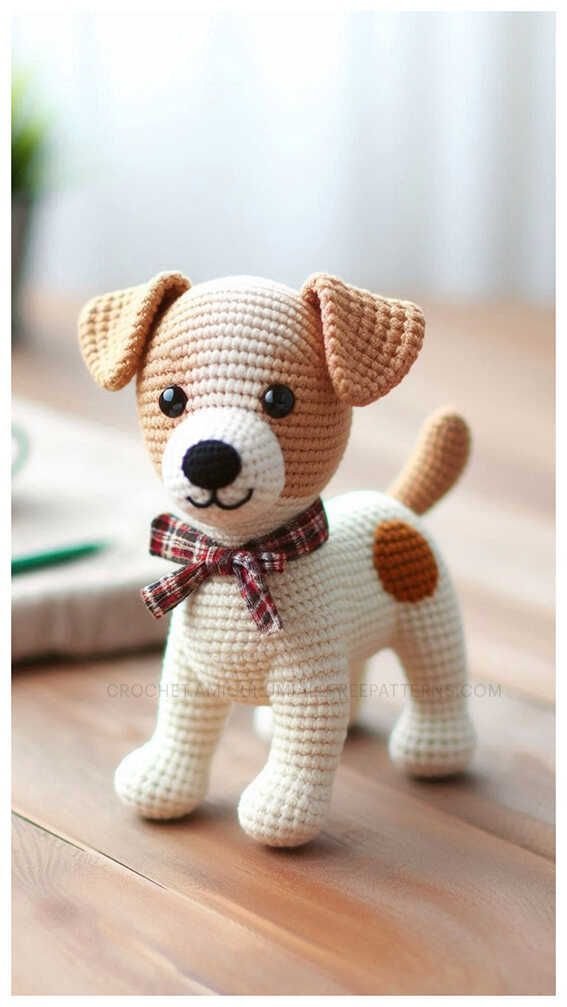
Terrier Amigurumi Pattern is more than just a crafting trend—it is a delightful way to bring creativity, comfort, and handmade charm into your life. Whether you are a seasoned crocheter or someone just discovering the magic of amigurumi, learning how to create a terrier in yarn form can be both rewarding and therapeutic. The growing popularity of crochet toys has made this niche one of the most searched topics among DIY enthusiasts, and it’s easy to understand why. Handmade terrier amigurumi figures make wonderful gifts, decorative pieces, and even cherished keepsakes.
The beauty of a Terrier Amigurumi Pattern lies in its versatility. You can customize the size, colors, facial expression, and even the breed characteristics of your terrier to match a real-life pet or an imagined furry friend. With a well-structured pattern, clear instructions, and a bit of patience, anyone can create a charming crochet terrier that looks professionally crafted. In today’s handmade market, personalized amigurumi animals are also in high demand, making this skill potentially profitable for creative entrepreneurs.
Understanding the details behind a Terrier Amigurumi Pattern is essential before starting your project. From choosing the right yarn and hook size to mastering basic stitches like single crochet, increases, and decreases, every step contributes to the final result. This guide will walk you through the essential concepts, techniques, and best practices to help you confidently create your own crochet terrier. By the end of this article, you will have a complete understanding of how to approach, execute, and perfect your terrier amigurumi project.
Understanding the Basics of a Terrier Amigurumi Pattern
A Terrier Amigurumi Pattern typically begins with a list of materials. You will need medium-weight yarn, a suitable crochet hook, stuffing fiber, safety eyes, and a yarn needle. Choosing high-quality materials ensures that your finished terrier will be durable and visually appealing. Soft acrylic or cotton yarn is often recommended for beginners.
The pattern structure usually follows a round-by-round format. Most amigurumi pieces are crocheted in continuous spirals rather than joined rounds. This technique creates a smooth, seamless appearance that enhances the realistic look of your terrier. Using a stitch marker helps you keep track of each round.
Basic crochet stitches form the foundation of any Terrier Amigurumi Pattern. The single crochet stitch is the most commonly used, along with increases and invisible decreases. Mastering these techniques ensures that the body and head shapes develop correctly. Consistency in tension is key to achieving a symmetrical result.
Shaping plays an important role in defining the terrier’s features. Gradual increases form rounded areas like the head and body, while decreases help contour the snout and legs. Following the pattern carefully will ensure balanced proportions and a professional finish.
Safety eyes are typically inserted before fully closing the head. Their placement dramatically affects your terrier’s personality. Positioning them slightly closer together creates a cute, puppy-like expression, while wider placement can produce a more realistic look.
Stuffing should be added gradually as you crochet. Even distribution prevents lumps and ensures that the terrier maintains its intended shape. Avoid overstuffing, as it can stretch the stitches and reveal gaps between them.
Choosing the Right Materials for Your Terrier Amigurumi Pattern
Selecting the appropriate yarn is crucial for a successful Terrier Amigurumi Pattern. Cotton yarn provides clear stitch definition, making it ideal for beginners who want to see each stitch clearly. Acrylic yarn, on the other hand, offers softness and flexibility, which works well for cuddly toys.
Hook size affects the tightness of your stitches. For amigurumi, it is recommended to use a hook slightly smaller than what the yarn label suggests. This creates tighter stitches and prevents stuffing from showing through the fabric.
Color selection allows for creative expression. Traditional terriers often feature shades like white, brown, black, or gray. However, you can experiment with pastel or vibrant colors for a playful twist on the classic design.
High-quality stuffing ensures that your crochet terrier keeps its shape over time. Polyester fiberfill is commonly used because it is lightweight and washable. Consistent stuffing density helps maintain structural integrity.
Safety eyes come in various sizes. Choosing the correct size depends on your terrier’s overall dimensions. Larger eyes emphasize a cartoonish style, while smaller eyes offer a realistic aesthetic.
Additional accessories such as small collars, bows, or embroidered details can elevate your Terrier Amigurumi Pattern. These finishing touches add personality and uniqueness to your handmade creation.
Step-by-Step Construction of a Terrier Amigurumi Pattern
The head is usually the first part created in a Terrier Amigurumi Pattern. It begins with a magic ring, followed by several rounds of increases to form a sphere. Careful counting ensures symmetry and proper shaping.
After reaching the widest point of the head, you will maintain even rounds before beginning decreases. This technique creates a rounded, natural head shape. Insert the safety eyes before fully closing the piece.
The body is often crocheted separately and attached later. Starting with a magic ring, gradual increases shape the torso. Some patterns incorporate slight shaping to mimic the sturdy build typical of terriers.
Legs are typically small cylindrical pieces. Crocheting them separately allows for precise positioning. Firm stuffing ensures that the terrier can sit upright if designed that way.
The ears define much of the terrier’s character. Depending on the style, they may be floppy or upright. Flat crocheted pieces folded and sewn in place create dimension and authenticity.
Assembly is the final and most delicate step. Pinning all parts before sewing ensures proper alignment. Secure stitching prevents parts from loosening over time, giving your amigurumi terrier durability and charm.
Tips to Perfect Your Terrier Amigurumi Pattern
Maintaining consistent tension throughout your Terrier Amigurumi Pattern is essential. Uneven stitches can distort shapes and create visible gaps. Practicing on small swatches can help you improve stitch consistency.
Reading the entire pattern before starting prevents confusion later. Familiarizing yourself with abbreviations and construction steps ensures a smoother crafting experience.
Using stitch markers not only tracks rounds but also marks key points like eye placement or limb attachment. Organization simplifies complex sections of the pattern.
If you make a mistake, do not hesitate to undo a few stitches. Precision is important in amigurumi, and correcting small errors early saves time in the long run.
Blocking is rarely necessary for amigurumi, but gently shaping the finished pieces by hand can enhance their final appearance. Light steaming (if yarn allows) may smooth minor irregularities.
Documenting your progress helps if you plan to recreate or modify the design later. Taking notes on adjustments ensures that your custom Terrier Amigurumi Pattern becomes even better over time.
FAQ About Terrier Amigurumi Pattern
What skill level is required for a Terrier Amigurumi Pattern?
Most patterns are beginner-friendly, but basic knowledge of single crochet, increases, and decreases is necessary. Intermediate crafters can experiment with more detailed shaping.
How long does it take to complete a Terrier Amigurumi Pattern?
Depending on your experience level, it can take anywhere from a few hours to a couple of days. More intricate designs require additional time.
What type of yarn is best for a Terrier Amigurumi Pattern?
Cotton and acrylic yarn are popular choices. Cotton provides better stitch definition, while acrylic offers softness and flexibility.
Can I sell items made from a Terrier Amigurumi Pattern?
In most cases, yes, as long as the pattern allows for commercial use. Always check the pattern designer’s terms and conditions.
How do I clean a finished terrier amigurumi?
If made with washable yarn and stuffing, gentle hand washing is recommended. Always air dry to maintain shape.
Why are my stitches visible or loose?
This often happens when using a hook that is too large. Switching to a smaller hook typically solves the issue.
Is it possible to customize the Terrier Amigurumi Pattern?
Absolutely. You can change colors, adjust ear shapes, or add accessories to personalize your crochet terrier.
What is the best way to attach limbs securely?
Sewing with strong yarn and reinforcing stitches ensures durability. Some crafters also use jointed attachments for movable limbs.
VIDIO TUTORIAL
Throughout this comprehensive guide, we explored everything you need to know about creating a successful Terrier Amigurumi Pattern, from understanding the foundational stitches to selecting the right materials and perfecting assembly techniques. By mastering tension control, shaping methods, and proper stuffing, you can create a beautifully crafted crochet terrier that reflects both skill and creativity.
Whether you are making a heartfelt gift, starting a handmade business, or simply enjoying a relaxing hobby, the Terrier Amigurumi Pattern offers endless possibilities for customization and artistic expression. Now that you have a detailed roadmap, it’s time to pick up your hook and start crafting your own charming terrier.
If you found this guide helpful, feel free to share your honest opinion and suggestions. Your feedback not only inspires improvement but also helps build a creative community around the art of amigurumi.