
The Bear Paw Quilt Block is a classic and timeless quilt pattern that has been cherished by quilters for generations. This beautiful block is known for its intricate yet simple design, making it a favorite for both beginners and experienced quilters.
The Bear Paw Quilt Block is a versatile pattern that can be adapted in many ways, allowing for creative freedom in quilting projects.
The origins of the Bear Paw Quilt Block date back to the 19th century, where it symbolized strength, courage, and a connection to nature.
Traditionally, it was used in storytelling quilts that conveyed deep messages. Today, quilters love this block for its historical significance and aesthetic appeal.
Creating a Bear Paw Quilt Block requires precision in piecing together squares and triangles, ensuring the distinctive “paw” shape is visible.
While the pattern may seem complex at first, following a structured approach makes it manageable. Let’s explore the process, variations, and tips for making a beautiful Bear Paw Quilt Block.
1. Materials Needed for a Bear Paw Quilt Block
Before starting, gathering the right materials is crucial. Here’s what you’ll need:
- Fabric Selection: Choose fabrics with contrasting colors to highlight the bear paw design.
- Cutting Tools: Rotary cutter, ruler, and self-healing cutting mat for precise cuts.
- Sewing Machine or Hand Sewing Supplies: Depending on your preference.
- Thread and Needles: High-quality thread ensures durability.
- Iron and Pressing Board: For crisp seams and a polished look.
- Quilting Pins or Clips: To hold fabric pieces in place while sewing.
Having all materials ready before starting will make the process smoother and more enjoyable. Organization is key to achieving perfect results.
2. Step-by-Step Guide to Making a Bear Paw Quilt Block
Follow these steps to create your own Bear Paw Quilt Block:
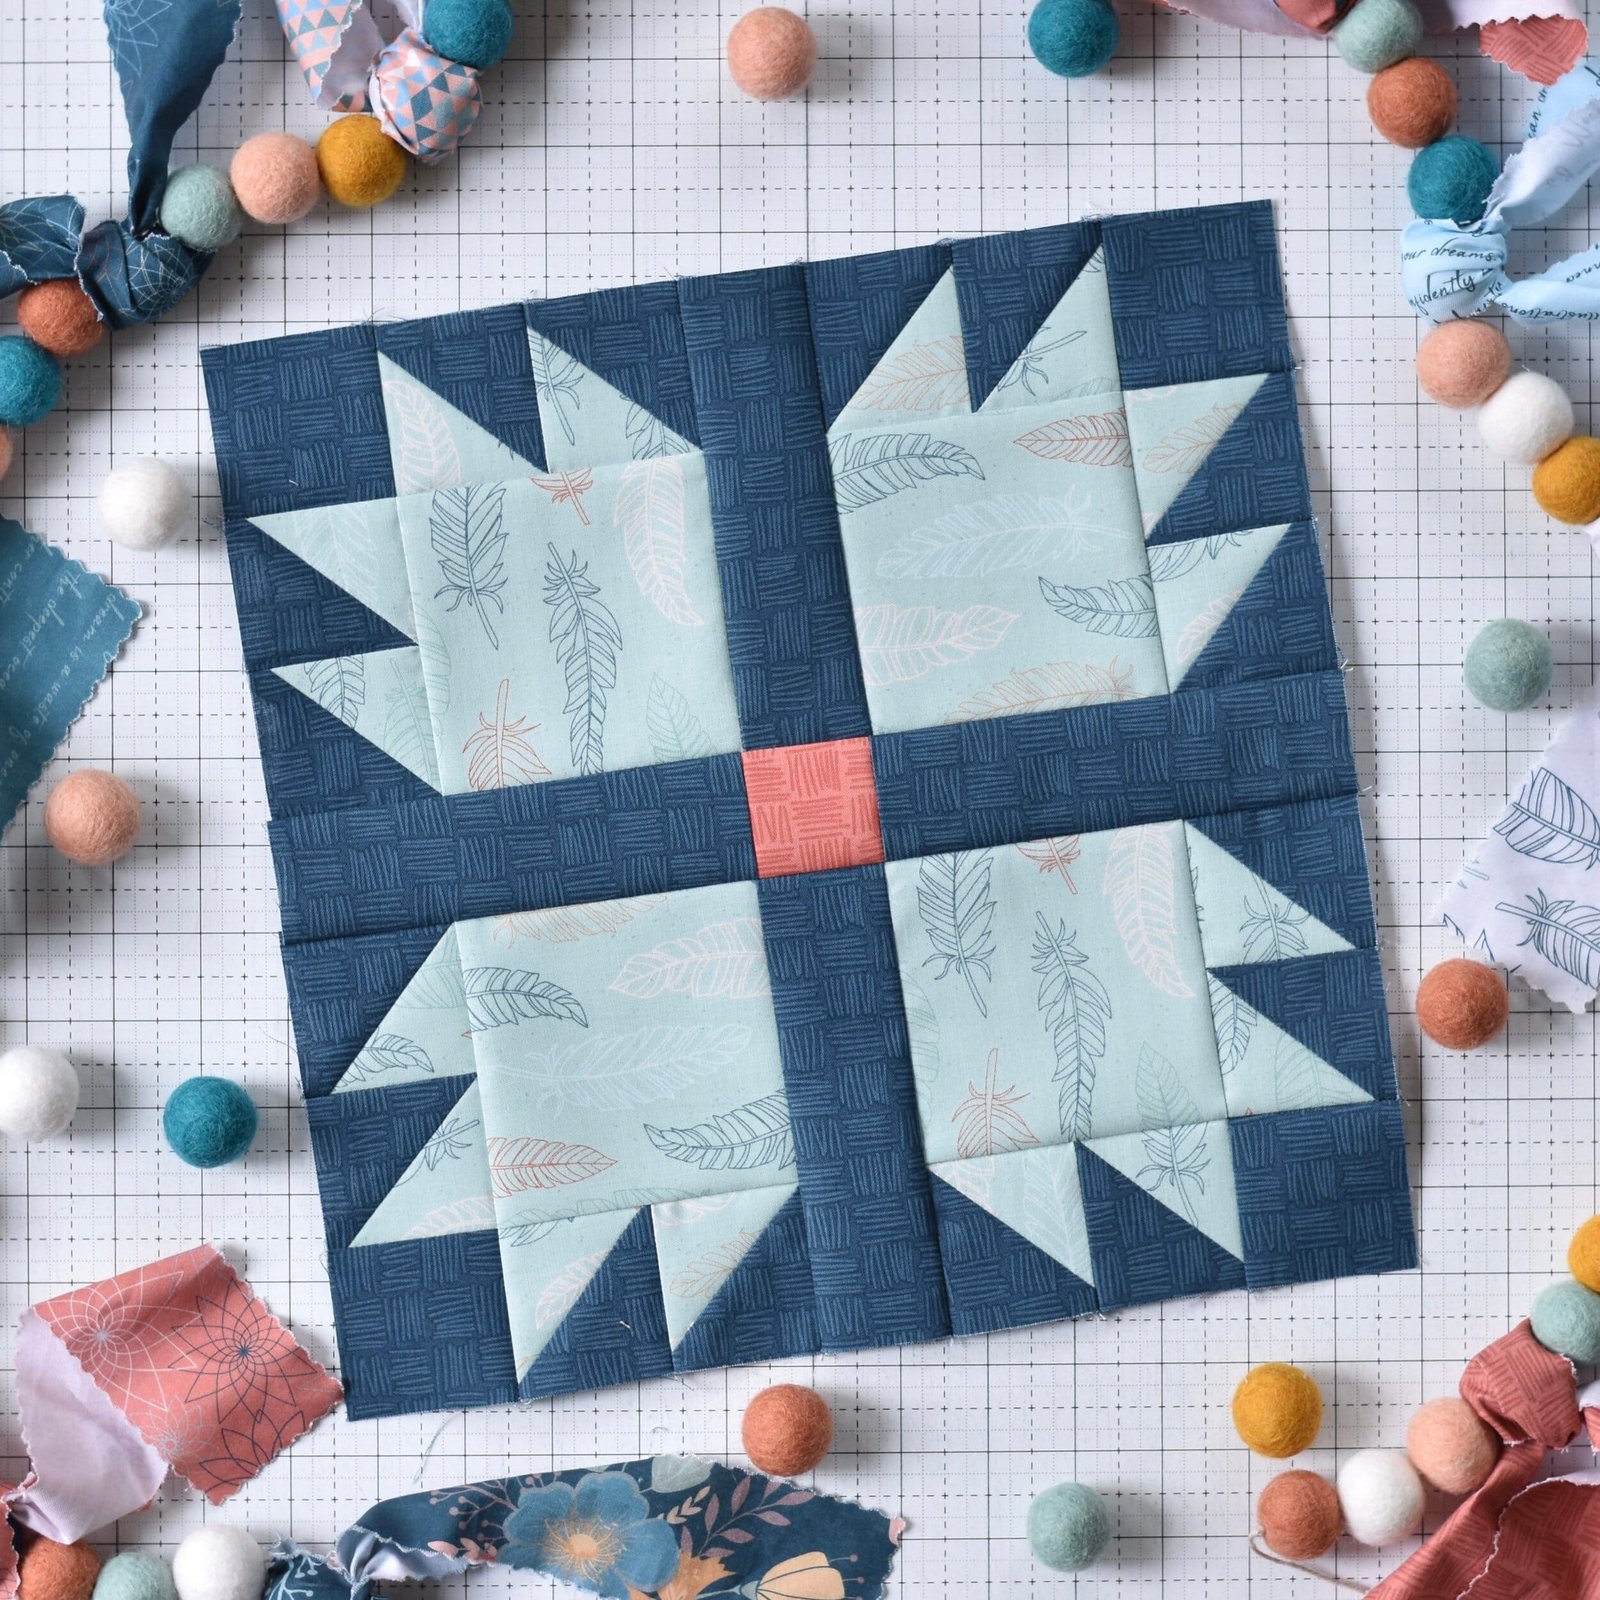
- Cut the Fabric: Start by cutting squares and triangles according to the pattern’s dimensions. The block typically consists of four smaller paw units surrounding a center square.
- Create Half-Square Triangles (HSTs): Pair light and dark fabric squares together, sew diagonally, and cut them to form HSTs.
- Assemble the Paw Units: Arrange the HSTs with additional fabric squares to form the “claws” of the bear paw.
- Sew the Pieces Together: Join the claw units with the center square and side rectangles to complete the block.
- Press the Seams: Use an iron to press seams open or to one side for a flat and professional finish.
- Check Measurements: Ensure the block maintains uniform dimensions before assembling multiple blocks into a quilt.
Taking your time at each step will help create precise and visually appealing quilt blocks.
3. Variations of the Bear Paw Quilt Block
There are many ways to modify the Bear Paw Quilt Block for a unique look:
- Color Variations: Experiment with bold colors, pastels, or monochromatic schemes to create different aesthetics.
- Fabric Patterns: Use prints, solids, or batiks to add texture and personality to the quilt.
- Block Size Adjustments: Enlarge or shrink the block to fit different quilt sizes and styles.
- Scrappy Bear Paw Blocks: Use leftover fabric scraps for a charming, rustic feel.
- Multiple Layouts: Arrange blocks in a straight setting, on-point, or alternate with other blocks for a diverse pattern.
- Appliqué and Embellishments: Add decorative stitches, embroidery, or appliqué to enhance the design.
These variations allow quilters to personalize their projects while maintaining the essence of the classic Bear Paw design.
4. Tips for Perfecting Your Bear Paw Quilt Block
To achieve the best results, consider these expert tips:
- Use Accurate Seam Allowances: A 1/4-inch seam allowance is standard in quilting for precise piecing.
- Starch Fabric Before Cutting: This prevents fabric stretching and helps maintain shape.
- Chain Piecing Technique: Speed up the sewing process by sewing multiple pieces in one go.
- Press Seams Properly: Press seams carefully to avoid bulk and achieve a smooth finish.
- Square Up Blocks: Trim blocks to ensure consistent sizes before assembling the quilt.
- Practice on Scrap Fabric: If you’re a beginner, practice making a small block first to gain confidence.
Following these tips will help you create a professional-looking quilt block with clean lines and sharp points.
FAQ: Bear Paw Quilt Block
Q: What size is a traditional Bear Paw Quilt Block?
A: Traditional sizes range from 6 to 12 inches, but you can adjust based on your project needs.
Q: Is the Bear Paw Quilt Block suitable for beginners?
A: Yes! While it has multiple pieces, careful cutting and sewing make it achievable for beginners.
Q: Can I make a Bear Paw Quilt Block by hand?
A: Absolutely! While a sewing machine speeds up the process, hand sewing offers a traditional touch.
Q: What is the best fabric for a Bear Paw Quilt Block?
A: Cotton fabric works best due to its stability and ease of use.
Q: How do I avoid puckering in my quilt block?
A: Use accurate seam allowances, press seams well, and sew slowly for precise stitching.
Q: Can I mix Bear Paw blocks with other quilt block patterns?
A: Yes! Combining Bear Paw blocks with log cabin, star, or nine-patch blocks creates beautiful quilt designs.
Join our VIP broadcast list and gain access to exclusive patterns, all for free. As a VIP member, you’ll receive the best patterns daily, delivered directly to your device. ✨📱 It’s a unique opportunity to stay up-to-date with the latest trends and designs, curated just for you. Don’t miss out on enhancing your projects and discovering new inspirations with the best patterns every day! 🎨🔝
Conclusion
The Bear Paw Quilt Block is a stunning and meaningful pattern that brings history, artistry, and craftsmanship together. Whether you’re a beginner or a seasoned quilter, this block offers endless creative possibilities. By carefully selecting fabrics, following precise cutting and sewing steps, and experimenting with variations, you can create a truly unique and beautiful quilt.
VIDEO TUTORIAL
We’d love to hear about your quilting journey! Share your thoughts, experiences, or suggestions in the comments below. Happy quilting!